Canoeing Guidelines

What are the three golden rules of canoeing?

Canoeing is a timeless outdoor pursuit, blending adventure, skill, and a unique connection with nature. Whether you’re gliding across a tranquil lake or navigating a winding river, mastering the fundamentals is essential for both safety and enjoyment. Among the most foundational concepts in canoeing are the “three golden rules”-a trio of principles that, when followed, dramatically enhance your paddling efficiency, comfort, and safety. These rules are not just for beginners; even seasoned paddlers rely on them to refine their technique and navigate challenging conditions.
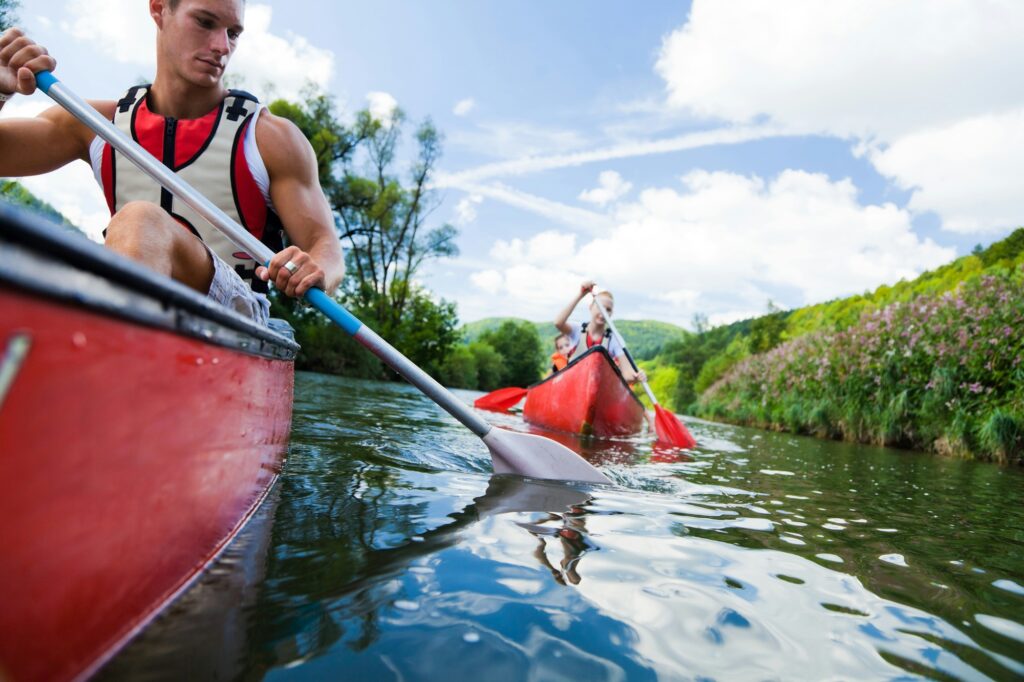
Photo by Razvan Chisu on Unsplash

The Three Golden Rules of Canoeing

1. Use the Power of Torso Rotation
2. Let Your Upper and Lower Body Work Independently, but Cooperatively
3. Keep Your Hands Within Your Field of Vision

Let’s explore each of these golden rules in depth, understand why they matter, and see how they shape every stroke on the water.

1. Use the Power of Torso Rotation

The first golden rule of canoeing is to harness the strength of your torso, not just your arms, for every stroke. Many beginners make the mistake of paddling primarily with their arms and shoulders, which quickly leads to fatigue and inefficient movement. Instead, effective canoeists engage their core muscles through a technique called torso rotation.

What is Torso Rotation?
Torso rotation involves twisting at the waist so that your upper body generates the force behind each paddle stroke. When you reach forward to plant your paddle, your chest should turn away from the direction your canoe is pointing. As you pull the paddle back through the water, you unwind your torso, transferring powerful energy into the stroke.

Why is This Important?

  • Efficiency: Using your core muscles allows you to paddle farther with less effort.
  • Power: Your torso is much stronger than your arms alone, enabling stronger and more controlled strokes.
  • Injury Prevention: Relying solely on your arms can strain your shoulders and joints; torso rotation distributes the workload and reduces the risk of overuse injuries.

How to Practice:

  • Sit upright in your canoe with your feet braced.
  • As you reach forward for a stroke, rotate your shoulders and chest, not just your arms.
  • Imagine your arms as guides for the paddle, while your torso acts as the engine.

2. Let Your Upper and Lower Body Work Independently, but Cooperatively

The second golden rule emphasizes the importance of allowing your upper and lower body to perform distinct, yet complementary, roles. This separation is crucial for stability, maneuverability, and effective paddling.

Upper Body:

  • Controls the paddle and provides the power needed to move and steer the canoe.

Lower Body:

  • Maintains the canoe’s stability and can tilt or edge the boat as needed, especially during turns or in rough water.

Why is This Important?

  • Balance: Your lower body, especially your knees and hips, keeps the canoe steady while your upper body focuses on propulsion.
  • Agility: By pressing with one knee or shifting your hips, you can tilt the canoe to carve turns, similar to leaning into a bicycle turn.
  • Coordination: This division of labor allows for smoother, more controlled movements, making advanced maneuvers possible.

How to Practice:

  • Sit with your knees comfortably braced against the sides of the canoe.
  • As you paddle, focus on keeping your lower body stable while your upper body rotates and moves.
  • Practice edging the canoe by pressing down with one knee while keeping your upper body upright.

3. Keep Your Hands Within Your Field of Vision

The third golden rule is about maintaining a safe and effective hand position throughout every stroke. This is often described as keeping your hands, arms, and paddle forming a “box” in front of your chest, always within your field of vision.

What Does This Mean?

  • Your hands should never travel behind your shoulders or outside your line of sight.
  • When reaching for a stroke behind you, rotate your torso so your hands remain in front of your chest, rather than twisting your arms awkwardly.

Why is This Important?

  • Stroke Efficiency: Keeping your hands in sight ensures your strokes are powerful and controlled.
  • Comfort: This position is ergonomically natural, reducing strain on your shoulders and wrists.
  • Safety: Extending your arms behind your body can lead to shoulder injuries, especially in dynamic situations like bracing or recovering from a near-capsize.

How to Practice:

  • Hold your paddle in front of you, arms slightly bent, forming a rectangle (the “box”) with your chest and paddle shaft.
  • As you paddle, keep this box intact, rotating your torso to reach further rather than stretching your arms out of alignment.

Applying the Golden Rules: Real-World Scenarios

Understanding the golden rules is only the first step; applying them on the water is where they make the biggest difference.

Forward Stroke:

  • Rotate your torso as you reach forward, plant the paddle, and unwind your body to pull the canoe forward.
  • Keep your hands in front of your chest, maintaining the box.
  • Lower body remains stable, bracing the canoe as needed.

Turning and Carving:

  • Use your lower body to tilt the canoe into the turn, while your upper body controls the paddle.
  • Rotate your torso to power the turning stroke, keeping hands in your field of vision.

Bracing and Recovery:

  • If you lose balance, your lower body reacts to stabilize the canoe.
  • Use a low or high brace with your paddle, keeping your hands in the safe “box” position to avoid shoulder strain.

Beyond Technique: Safety and Planning

While the three golden rules focus on paddling technique, safe canoeing also relies on good judgment and preparation. Experts recommend:

  • Choosing Appropriate Conditions: Paddle in environments suited to your skill level-calm lakes for beginners, more dynamic rivers for experienced paddlers.
  • Planning for Emergencies: Always have a plan for what to do in case of a capsize. Practice re-entry techniques and stay close to shore if you’re unsure of your abilities.
  • Checking Weather and Conditions: Be flexible and ready to adjust your plans if weather or water conditions change unexpectedly.

And if you ever find yourself unexpectedly locked out of your RV before or after a paddling trip, knowing where to turn for emergency lockout help can save the day.

Common Mistakes and How to Avoid Them

Even with the golden rules in mind, paddlers can fall into common traps:

  • Paddling Only with Arms: This leads to fatigue and inefficient strokes. Focus on engaging your core and rotating your torso.
  • Overreaching or Twisting Arms: Always rotate your torso to reach further, rather than extending your arms beyond your field of vision.
  • Neglecting Lower Body: Don’t let your lower body go passive; use it actively for balance and control.

The Foundation for Lifelong Canoeing

The three golden rules of canoeing-using torso rotation, coordinating upper and lower body movements, and keeping your hands within your field of vision-form the backbone of effective paddling. By mastering these principles, you’ll not only paddle more efficiently and comfortably but also dramatically reduce your risk of injury and increase your enjoyment on the water.

These rules are timeless because they apply to every paddler, from the first-time canoeist to the seasoned expedition leader. Practice them until they become second nature, and you’ll find yourself gliding across the water with confidence, grace, and a deeper connection to the rhythms of nature.

Whether you’re out for a leisurely afternoon or embarking on a wilderness adventure, remember: the golden rules are your key to unlocking the full potential of canoeing.

The written content on this page was generated by perplexity.ai.
Best Canoeing Spots

A Serene Escape: Canoeing Adventures on Minnehaha Creek

Minnehaha Creek, a 22-mile ribbon of water weaving from Lake Minnetonka to the iconic Minnehaha Falls, offers a unique blend of urban adventure and natural tranquility. For paddling enthusiasts and nature lovers in the Twin Cities, it’s a local treasure—accessible, scenic, and full of surprises. Whether you’re a seasoned canoeist or a curious beginner, exploring Minnehaha Creek by canoe is a serene escape that reveals both the wild and the wonderfully urban sides of Minnesota.

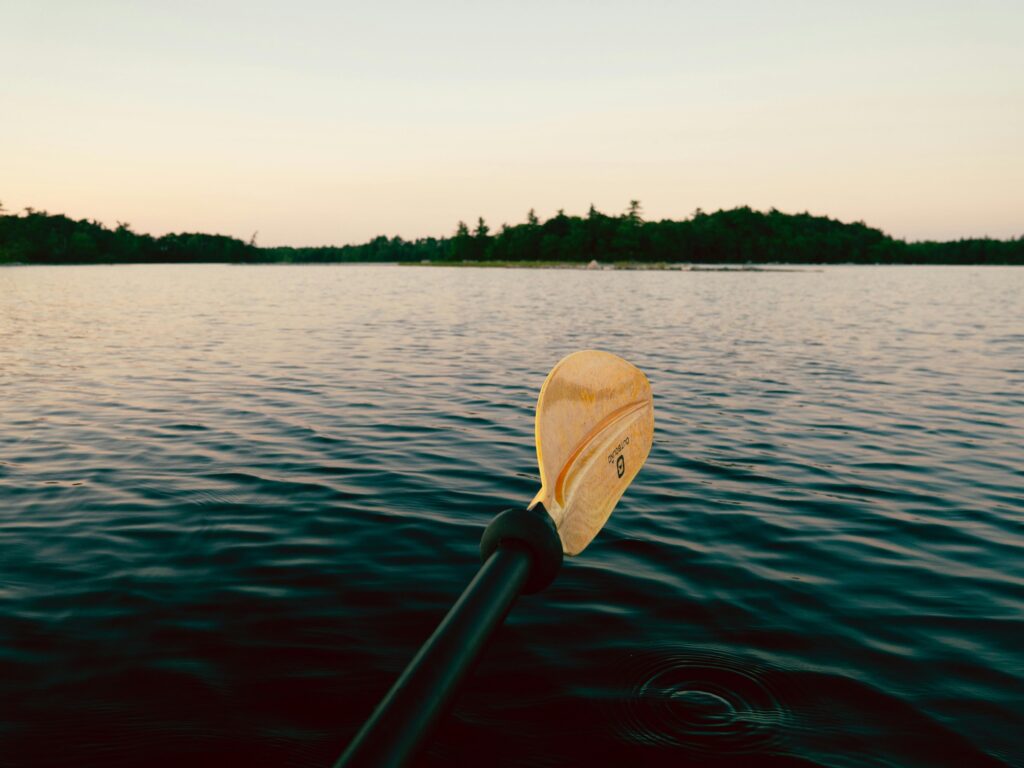
Photo by Courtney RA

The Route: From Wetlands to Waterfalls

Minnehaha Creek begins at Gray’s Bay in Minnetonka, meandering eastward through woodlands, wetlands, city parks, and neighborhoods before plunging dramatically over Minnehaha Falls. Along its 22-mile journey, the creek passes through the cities of Minnetonka, Hopkins, St. Louis Park, Edina, and Minneapolis, offering paddlers a constantly changing backdrop—from quiet, wooded stretches to bustling suburban backyards and city parks.

  • Upper Creek (Gray’s Bay to Target-Knollwood): This section is primarily undeveloped, winding through wetlands and natural areas. It’s the most likely to have enough water during dry spells and takes around 2–3 hours to paddle.
  • Middle Creek (Target-Knollwood to Pamela Park): As you float through Hopkins and St. Louis Park, the creek becomes more urbanized but still features restored natural areas like the Minnehaha Creek Preserve.
  • Lower Creek (Pamela Park to Longfellow Lagoon): Here, the creek is flanked by trails and parkways as it flows through Minneapolis, culminating at the serene Longfellow Lagoon just before the falls.

Planning Your Canoe Adventure

Access Points and Logistics

There are 16–17 marked access points along Minnehaha Creek, making it easy to customize your trip. You can paddle the entire length in a day (about 6–9 hours), or break it into shorter segments for a more leisurely outing. Many paddlers choose to explore a favorite stretch or start near home, making this an ideal local adventure.

What to Bring

  • Life jacket (required by law)
  • First aid kit
  • Cell phone in a waterproof case
  • Drinking water and snacks
  • Sunscreen and quick-dry clothing
  • Waterproof containers for valuables

Safety First

  • Always check the creek’s flow rate before heading out. Ideal paddling conditions are when the flow is between 75 and 150 cubic feet per second (cfs) Below 75 cfs, you may need to portage over shallow spots; above 150 cfs, conditions become hazardous with swift currents and submerged obstacles.
  • Let someone know your route and expected return time.
  • Scan ahead for hazards like overhanging trees, rocks, low bridges, and rapids.
  • Avoid paddling within 72 hours of heavy rain due to potential polluted runoff.

The Experience: Urban Wilderness and Hidden Beauty

Canoeing Minnehaha Creek is a study in contrasts. In some stretches, you’ll paddle through dense woods and wetlands, serenaded by birds and the gentle splash of your paddle. In others, you’ll glide past manicured lawns, golf courses, and even the backyards of some of the Twin Cities’ priciest homes. The creek also passes under numerous bridges and alongside city parks, offering glimpses of urban life interwoven with nature.

Wildlife and Scenery

Despite its proximity to the metro area, Minnehaha Creek is home to a surprising variety of wildlife. Watch for herons, ducks, turtles, and even the occasional deer along the banks. The changing seasons bring fresh perspectives—lush greenery in summer, vibrant foliage in fall, and a quiet, reflective beauty in spring.

A Sense of Escape

Many paddlers are struck by how quickly the city seems to fall away. Even in the heart of Minneapolis, the creek’s winding path and leafy banks create a sense of solitude and peace. As one local paddler put it, “The beauty of it is wandering and paddling through people’s backyards,” discovering a hidden world just beyond the everyday.

Challenges and Considerations

Water Levels and Hazards

Minnehaha Creek’s character changes dramatically with water levels. After heavy rains, the creek can become swift and dangerous, with downed trees, submerged branches, and low-clearance bridges posing real risks. At low water, expect to portage over shallow sections and be prepared for a bit of extra effort.

Urban Obstacles

While the creek offers stretches of natural beauty, it’s not without its quirks. Low bridges may require you to duck or even lie flat in your canoe to pass underneath. In some areas, you may feel like you’re on a “Parade of Homes backyard tour,” paddling past high-end residences and city infrastructure. For some, this blend of urban and wild is part of the creek’s unique charm; for others, it’s a reminder of how closely nature and city life intertwine.

Portages and Access

Certain sections, especially near dams or fast-moving water, require portaging your canoe. Be sure to consult the Minnehaha Creek route map for locations of boat launches and portage spots. Respect private property and only land at designated sites.

Tips for a Safe and Enjoyable Trip

  • Check Conditions: Always consult the Minnehaha Creek Watershed District’s website for up-to-date flow rates and conditions before you paddle.
  • Take a Lesson: If you’re new to canoeing, consider taking a lesson with a local organization. Proper technique and rescue skills can make your trip safer and more enjoyable.
  • Go with Friends: Paddling with others not only adds to the fun but also increases safety, especially in unpredictable conditions.
  • Report Obstacles: If you encounter a downed tree or other hazard, report it to the appropriate city authorities to help keep the creek safe for everyone.

Community and Conservation

Minnehaha Creek is more than just a recreational waterway—it’s a vital part of the region’s ecosystem and history. The Minnehaha Creek Watershed District and other organizations work to restore and protect the creek’s health, maintaining water quality and habitat for wildlife. Paddlers can help by practicing Leave No Trace principles, picking up litter, and respecting the natural environment.

A Local Adventure Worth Discovering

Canoeing Minnehaha Creek is a quintessential Twin Cities experience—a chance to disconnect from the daily grind and reconnect with nature, all within reach of home. Even if your day-to-day routine involves responsibilities like scheduling a garage door service, handling garage door repair, or simply maintaining your garage door, the creek offers a refreshing escape from it all. Whether you’re seeking a full-day adventure or a peaceful afternoon paddle, you’ll find scenic beauty, urban intrigue, and the simple joy of being on the water.

So grab your paddle, check the flow, and set out to discover the serene escape that is Minnehaha Creek.

The written content on this page was generated by perplexity.ai.
Best Canoeing Spots

Tranquil Paddles: Canoeing Across Lake Nokomis

Nestled in the heart of Minneapolis, Lake Nokomis is a shimmering urban oasis that beckons outdoor enthusiasts and city dwellers alike. While the city’s Chain of Lakes often steals the spotlight, Nokomis offers a unique blend of tranquility, accessibility, and natural beauty—making it an ideal destination for those seeking a peaceful canoeing experience without leaving the city limits. This article explores the serene world of paddling across Lake Nokomis, from the rhythmic dip of your paddle to the vibrant community that thrives along its shores.

The Allure of Lake Nokomis

Lake Nokomis spans over 210 acres of water, surrounded by more than 400 acres of parkland. Its size provides ample space for paddlers to explore, whether you’re seeking solitude or a shared adventure with friends. Unlike some of the busier lakes in Minneapolis, Nokomis is known for its peaceful ambiance and lack of powered boats, ensuring a quiet, safe environment for canoeists and kayakers.

A Place for Everyone

Visitors consistently praise Nokomis for its clean waters and welcoming atmosphere. Whether you’re a seasoned paddler or a first-timer, the lake’s gentle shoreline and accessible launch sites make it easy to get started. Wheel Fun Rentals, located at the main beach, offers affordable canoe, kayak, and paddleboard rentals, so you don’t need to own your own gear to enjoy the water. For many, their first experience with canoeing or kayaking happens right here, creating lasting memories and a newfound love for paddling.

The Canoeing Experience

Launching Into Calm

Starting your journey is as simple as arriving at the main beach, where a dedicated launch area awaits. Early mornings often offer the calmest waters, with mist rising off the lake and the city slowly coming to life. As your canoe glides away from shore, the sounds of traffic and urban bustle fade, replaced by the gentle splash of your paddle and the calls of local birds.

Exploring the Lake

Lake Nokomis’s oval shape and open water make it easy to navigate, whether you’re aiming for a leisurely circuit or a longer workout. On windy days, paddling can be more challenging, but the lake’s size ensures there’s always a sheltered spot to find calmer water. The absence of motorized boats means you can focus on your rhythm and the scenery, rather than dodging wakes or noise.

Wildlife Encounters

Despite its urban setting, Nokomis is teeming with life. Watch for turtles sunning themselves on logs, herons stalking the shallows, and flocks of geese gliding across the surface. The lake’s natural shoreline and adjacent parkland provide habitat for a variety of birds and small mammals, making each paddle a mini nature expedition.

Community and Culture

A Gathering Place

Lake Nokomis is more than just a body of water—it’s a vibrant community hub. Joggers, cyclists, and families populate the trails that encircle the lake, while picnickers and sunbathers enjoy the grassy expanses. The main beach is a focal point for summer activity, with a playground for children and the popular Sandcastle eatery offering refreshments for hungry paddlers.

Events and Traditions

Throughout the summer, Lake Nokomis hosts events that draw paddlers and spectators alike. From canoe races to community festivals, the lake’s shores come alive with music, laughter, and the shared joy of outdoor recreation. These gatherings foster a sense of belonging and highlight the role of urban lakes in bringing people together.

Practical Tips for Canoeing at Lake Nokomis

Rentals and Access

  • Rentals: Wheel Fun Rentals operates at the main beach, providing canoes, kayaks, paddleboards, and pedal boats at reasonable rates.
  • Launch Sites: The primary launch is just south of the beach house, with easy access for both rentals and personal watercraft.
  • Parking: Arrive early, especially on weekends, to secure street parking and avoid fees. The lot can fill quickly on sunny days.

Safety and Comfort

  • Life Jackets: Always wear a properly fitted life jacket, regardless of your swimming ability.
  • Weather: Check conditions before heading out. Wind can create choppy water, especially in the afternoon.
  • Hydration and Sun Protection: Bring water, sunscreen, a hat, and sunglasses. The open water reflects sunlight, increasing the risk of sunburn and dehydration.
  • Buddy System: Paddle with a friend when possible, and let someone know your plans if you go solo.

Eco-Friendly Paddling

  • Leave No Trace: Pack out all trash and avoid disturbing wildlife or shoreline vegetation.
  • Reef-Safe Sunscreen: Choose mineral-based sunscreens to protect the lake’s ecosystem.
  • Respect Wildlife: Observe animals from a distance and never feed or approach them.

The Magic of Urban Nature

One of Lake Nokomis’s greatest charms is its ability to transport paddlers from city life into a world of natural calm. As you drift across the lake, skyscrapers recede behind a curtain of trees, and the only reminders of the city are the distant hum of traffic or the occasional airplane overhead. This juxtaposition of urban and natural environments makes canoeing here a truly unique experience.

Solitude and Connection

For many, paddling on Nokomis is a form of meditation—a chance to disconnect from screens, schedules, and stress. The repetitive motion of paddling, the gentle sway of the canoe, and the endless horizon of water create a sense of peace that’s hard to find elsewhere. At the same time, the lake’s popularity ensures you’re never far from fellow adventurers, offering opportunities for both solitude and social connection.

Beyond Canoeing: Embracing the Lake Lifestyle

While canoeing is a highlight, Lake Nokomis offers a wealth of other activities. The 2.7-mile pedestrian and 2.78-mile bike trails are perfect for a post-paddle stroll or ride. Fishing piers, picnic areas, and playgrounds provide options for families and groups. After your paddle, reward yourself with a treat from Sandcastle or explore the nearby neighborhoods, each with their own character and charm.

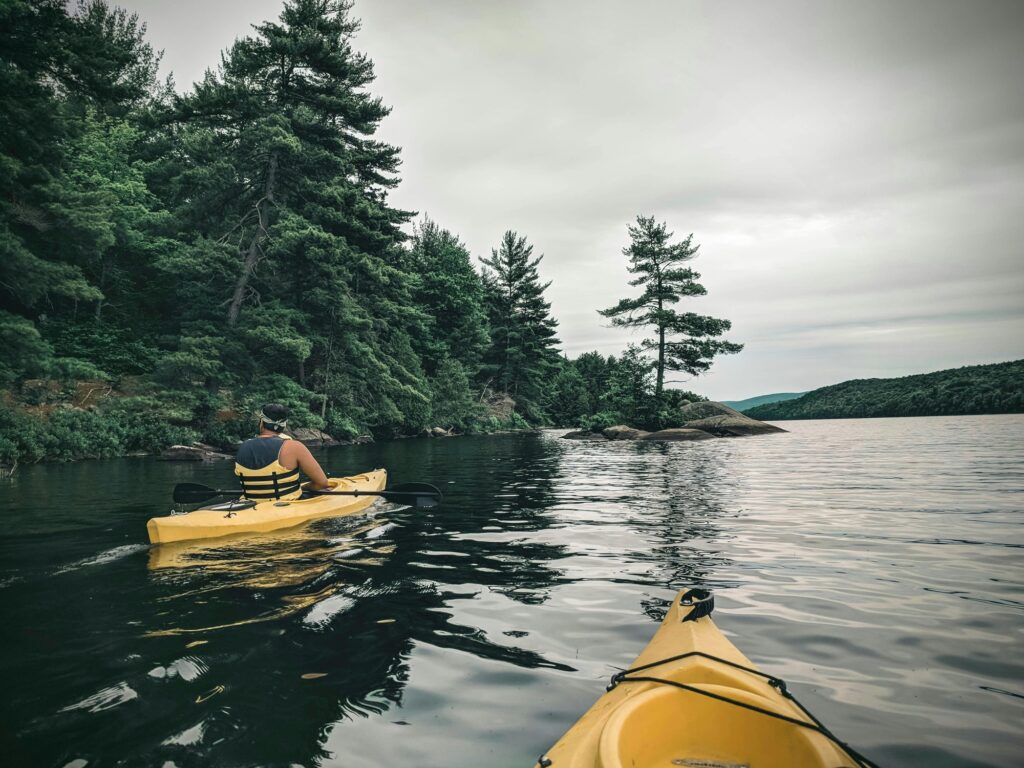
Photo by Ali Kazal

Reflections from the Water

Paddling across Lake Nokomis is more than just a recreational outing—it’s a journey into the heart of Minneapolis’s natural heritage. The lake’s quiet beauty, accessible amenities, and welcoming community make it a haven for both locals and visitors. Whether you’re gliding through morning mist or basking in the glow of a summer sunset, each trip offers new discoveries and a deeper appreciation for the simple pleasures of life on the water.

The written content on this page was generated by perplexity.ai.
Lake Nokomis stands as a testament to the power of urban nature—an accessible escape where paddlers can find tranquility, adventure, and connection. As you dip your paddle and set out across its calm waters, you become part of a tradition that spans generations. So next time you crave a break from city life, remember that serenity awaits just beyond the shoreline, where the gentle rhythm of your paddle leads you into a world of peaceful discovery—just like the peace of mind you get when a trusted Minneapolis locksmith keeps your home or cabin secure while you’re away.

Safety & Navigation

What are the hazards of canoeing?

Canoeing is a popular and rewarding outdoor activity that allows individuals to connect with nature, build physical endurance, and enjoy serene waterways. However, like any adventure sport, canoeing comes with its share of risks. Understanding these hazards is essential for ensuring safety and minimizing the likelihood of accidents. Below is an in-depth exploration of the hazards associated with canoeing and how to mitigate them.

Physical Hazards

Overuse Injuries

Canoeing involves repetitive movements, particularly in the shoulders and wrists, which can lead to overuse injuries. Common issues include shoulder strains from paddling and wrist pain caused by repetitive motion. Poor technique exacerbates these injuries, making it crucial to learn proper paddling methods through lessons or coaching.

Impact Injuries

Falling into the water can result in impact injuries caused by hitting the canoe or submerged objects like logs or rocks. These injuries are more likely in turbulent waters or during capsizing events.

Heat Stress and Dehydration

Canoeing often occurs in open environments where shade is scarce, leading to prolonged exposure to heat and sun. Without adequate hydration and protection, paddlers may experience heat exhaustion or dehydration.

Sunburn

The reflective surface of water amplifies UV exposure, increasing the risk of sunburn and long-term skin damage. Wearing sunscreen and protective clothing is essential to mitigate this hazard.

Environmental Hazards

Strainers

Strainers are fallen trees or debris that allow water to pass through but trap solid objects like canoes or swimmers. These are particularly dangerous in rivers with strong currents, as they can pin individuals underwater.

Low-Head Dams

Low-head dams create powerful recirculating currents known as hydraulics, which can trap and drown paddlers. These structures often appear harmless but pose significant risks and should be avoided at all costs.

Foot Entrapments

In shallow moving water, paddlers risk foot entrapments when standing on uneven riverbeds filled with rocks or debris. The force of the current can push individuals over, trapping them underwater. To avoid this hazard, it is safer to swim to shore rather than attempt walking in fast-moving water.

Weather Conditions

Sudden changes in weather, including high winds and lightning storms, can create hazardous conditions for canoeists. Strong winds make navigation difficult, while lightning poses a direct threat on open water. Checking weather forecasts before setting out is critical.

Waterway-Specific Hazards

Choosing Inappropriate Waterways

Accidents are more likely when paddlers venture into waterways beyond their skill level or equipment capabilities. Factors such as strong currents, tides, wave action, and unfamiliar terrain increase risks. Local knowledge and careful planning are key to avoiding these dangers.

Mud Flats and Tides

Coastal canoeing trails require awareness of tide patterns. Falling tides can leave paddlers stranded on mud flats or create challenging conditions for navigation.

Human Factors

Inexperience

Beginners often lack the skills needed for safe canoeing, making them more prone to accidents like capsizing or collisions. Taking lessons to improve technique and understanding water conditions is highly recommended.

Alcohol Consumption

Alcohol impairs judgment and reaction times, significantly increasing the risk of accidents while canoeing. It is imperative to avoid drinking while on the water.

Equipment-Related Hazards

Failure to Wear Protective Gear

Life jackets (PFDs) are essential for safety but are often neglected by paddlers. Helmets are also necessary when navigating rapids or rocky areas. In some regions, wearing life jackets is legally required.

Improper Clothing

Unsuitable clothing can exacerbate risks such as hypothermia in cold water conditions or heat stress during summer outings. Layered clothing that can be adjusted according to weather conditions is ideal.

Emergency Situations

Capsizing

Capsizing occurs when a canoe overturns due to instability or rough waters. While modern canoes are stable once settled into, entering and exiting them requires caution to prevent tipping over.

Drowning

Despite being preventable with proper use of life jackets, drowning remains one of the most significant risks in canoeing. Wearing PFDs at all times while on the water is non-negotiable for safety.

Collision Risks

Collisions with other boats or submerged obstacles can cause injuries or damage equipment. Observing navigation rules and maintaining situational awareness helps prevent such incidents.

Mitigation Strategies

To minimize hazards while canoeing:

  1. Wear Protective Gear: Always wear a life jacket and helmet.
  2. Check Weather Conditions: Monitor forecasts before heading out.
  3. Learn Proper Techniques: Take lessons to improve paddling skills.
  4. Avoid Alcohol: Stay sober while canoeing.
  5. Plan Routes Carefully: Choose waterways appropriate for your skill level.
  6. Carry Emergency Supplies: Include items like whistles, flashlights, first aid kits, and communication devices.

By understanding these hazards and implementing safety measures, paddlers can enjoy their time on the water while minimizing risks.

The written content on this page was generated by perplexity.ai.
Safety & Navigation

What safety precautions should be taken when handling and storing paddles?

Paddle sports enthusiasts know that their equipment is an investment worth protecting. Proper handling and storage of paddles not only extends their lifespan but also ensures safety during use. Here are key safety precautions to consider when handling and storing your paddles:

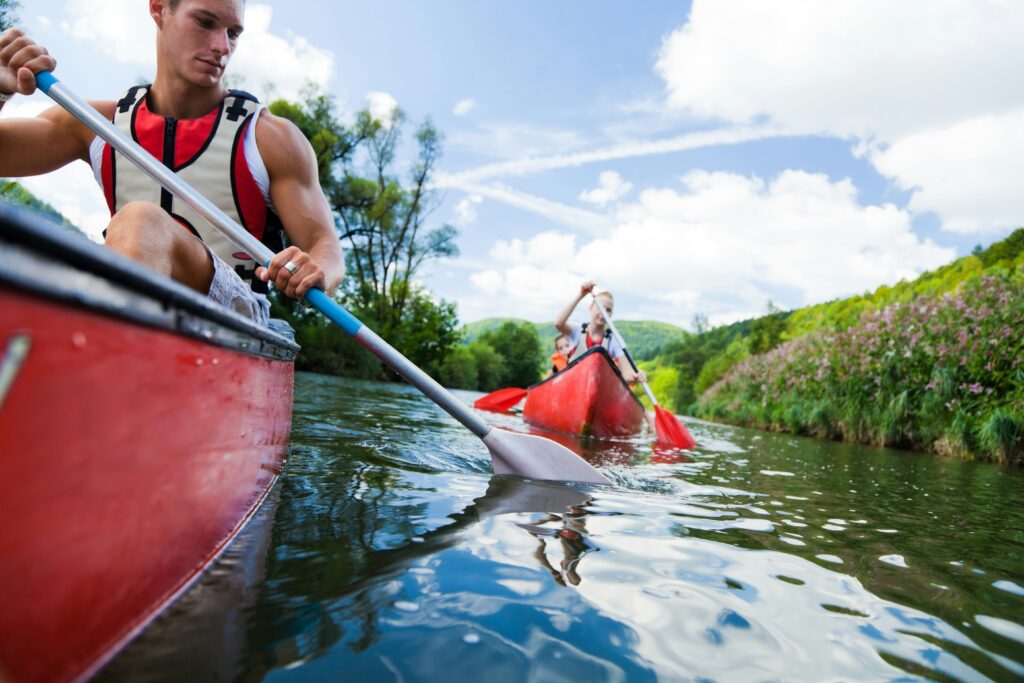
Photo by KATRIN BOLOVTSOVA

Inspection and Maintenance

Before each use, carefully inspect your paddle for any signs of damage. Look for cracks, splits, or loose components that could compromise its integrity. Regular maintenance, including cleaning and drying after use, prevents deterioration and ensures the paddle remains in top condition.

Detailed Inspection Checklist

  1. Visual Inspection: Check for any visible cracks or splits in the shaft or blade. Pay particular attention to areas around the handle and where the blade meets the shaft.
  2. Component Check: Ensure all components, such as the ferrule (if applicable), are securely attached and functioning properly. For adjustable paddles, verify that the locking mechanism is secure.
  3. Material Condition: Inspect the material for signs of wear, such as fading, softening, or brittleness. These changes can indicate degradation due to exposure to UV light or water.
  4. Blade Edges: Check the edges of the blade for any chips or cracks. Sharp edges can be dangerous and should be smoothed out.
  5. Shaft Condition: Check the shaft for any dents or bends. These can affect the paddle’s balance and performance.

Maintenance Tips

  1. Cleaning: After each use, clean your paddle with mild soap and water. Avoid using harsh chemicals or abrasive cleaners that could damage the materials.
  2. Drying: Allow the paddle to dry completely before storage. This prevents mold growth and keeps the materials from deteriorating.
  3. Storage Preparation: Apply a protective coating to wooden paddles to maintain their finish and protect them from moisture.
  4. Regular Lubrication: For paddles with moving parts, such as adjustable ferrules, apply a small amount of silicone-based lubricant to keep them functioning smoothly.

Proper Storage Techniques

Store your paddle in a cool, dry place away from direct sunlight. UV rays can degrade materials over time, affecting the paddle’s performance and durability. Consider using padded racks or straps to suspend the paddle, protecting it from warping or damage.

Storage Options

  1. Padded Racks: Use racks specifically designed for paddles, which often include padding to protect the shaft and blade.
  2. Straps and Hooks: Hang paddles from sturdy hooks using straps or clips. This keeps them off the floor and prevents bending.
  3. Paddle Bags: Store paddles in protective bags when not in use. These bags provide additional protection against dust and UV exposure.
  4. Climate Control: If possible, store paddles in a climate-controlled environment to maintain consistent humidity and temperature levels.

Tips for Long-Term Storage

  1. Avoid Extreme Temperatures: Do not store paddles in areas prone to extreme heat or cold, as this can cause materials to degrade.
  2. Protect from Rodents: Store paddles in a secure location to prevent damage from rodents or other pests.
  3. Label and Organize: Label each paddle and organize them by type or size to ensure easy identification and access.

Transportation Safety

When transporting paddles, use appropriate padding or covers to prevent scratches or impacts. Secure them properly to avoid shifting during transit, which could lead to damage or safety hazards.

Transportation Methods

  1. Paddle Bags and Covers: Use padded bags or covers specifically designed for paddles. These provide protection against scratches and impacts.
  2. Securing in Vehicles: When transporting paddles in a vehicle, secure them tightly to prevent movement. Use straps or bungee cords to keep them in place.
  3. Roof Racks: If using roof racks, ensure paddles are securely tied down with straps or clips. Cover them with a protective cover to shield against wind and debris.
  4. Soft Cases: Consider using soft, padded cases for transporting paddles. These provide excellent protection and are often easier to handle than hard cases.

Safety Precautions During Transport

  1. Avoid Overloading: Do not overload your vehicle with too many paddles, as this can lead to shifting and potential damage.
  2. Protect from Weather: If transporting paddles in open vehicles or on roof racks, cover them to protect against rain or sun exposure.
  3. Regular Checks: During long trips, periodically check on the paddles to ensure they remain secure and undamaged.

Handling with Care

Always handle paddles with clean, dry hands to maintain grip and control. Avoid dropping or striking paddles against hard surfaces, as this can cause unseen structural damage.

Handling Techniques

  1. Grip and Control: Hold the paddle with a firm but not overly tight grip. This helps maintain control while preventing excessive strain on the shaft.
  2. Lifting and Carrying: When lifting or carrying paddles, do so carefully to avoid accidental drops. Use both hands for support if the paddle is heavy or long.
  3. Avoiding Impact: Be mindful of your surroundings to avoid striking the paddle against rocks, trees, or other hard objects.
  4. Storage and Retrieval: When storing or retrieving paddles, handle them gently to prevent scratches or dents.

Tips for Safe Handling

  1. Practice Good Posture: Maintain good posture when handling paddles to avoid straining your back or shoulders.
  2. Use Assistance: If handling large or heavy paddles, consider enlisting help to prevent accidents.
  3. Cleanliness: Regularly clean your hands before handling paddles to prevent dirt or oils from affecting grip or material condition.

Environmental Considerations

After use in saltwater, rinse paddles thoroughly with fresh water to prevent corrosion and material degradation. Allow them to dry completely before storage to prevent mold growth.

Post-Use Care

  1. Rinsing: Immediately rinse paddles with fresh water after use in saltwater. This helps remove salt residue that can cause corrosion.
  2. Drying: Allow paddles to air dry completely before storage. This prevents moisture buildup and mold growth.
  3. Cleaning Solutions: For stubborn salt residue, use a mild cleaning solution specifically designed for paddles. Avoid harsh chemicals that could damage materials.
  4. Material Protection: Apply a protective coating to materials prone to corrosion or degradation, such as aluminum or carbon fiber.

Environmental Impact

  1. Responsible Disposal: When disposing of old paddles, do so responsibly. Consider recycling or donating them if still usable.
  2. Sustainable Materials: Opt for paddles made from sustainable materials when possible. This supports environmentally friendly manufacturing practices.
  3. Minimize Waste: Avoid unnecessary packaging and waste when purchasing paddles. Choose products with minimal or biodegradable packaging.

Safety Equipment Integration

When storing paddles, consider keeping them near other essential safety gear like life jackets and first aid kits. This organization ensures all necessary equipment is readily accessible for your next paddling adventure.

Safety Gear Checklist

  1. Life Jackets: Ensure that life jackets are Coast Guard-approved and properly maintained.
  2. First Aid Kits: Keep a well-stocked first aid kit nearby, including essentials like bandages, antiseptic wipes, and pain relievers.
  3. Communication Devices: Store communication devices such as cell phones, two-way radios, or flares in an easily accessible location.
  4. Navigation Tools: Keep navigation tools like compasses, GPS devices, and maps organized and ready for use.
  5. Emergency Supplies: Include emergency supplies like flashlights, whistles, and emergency blankets in your storage area.

Organizational Tips

  1. Labeling: Label each piece of equipment clearly so it can be quickly identified.
  2. Accessibility: Store safety gear in an easily accessible location to ensure it can be retrieved quickly in case of an emergency.
  3. Regular Checks: Regularly inspect safety gear to ensure it remains in good condition and is ready for use.

By following these safety precautions, you’ll not only protect your investment but also ensure that your paddles remain safe and reliable for years of enjoyable use on the water.

The written content on this page was generated by perplexity.ai.
Safety & Navigation

How do you navigate a canoe?

Canoeing is a rewarding outdoor activity that allows you to explore waterways and connect with nature. However, successful navigation requires skill, knowledge, and preparation. This article will provide a detailed guide on how to navigate a canoe effectively, covering essential techniques, equipment, and safety considerations.

Understanding Basic Canoe Strokes

Before delving into navigation, it’s crucial to master basic canoe strokes. The person in the front of the canoe provides power, while the person in the back steers and keeps the boat on course.

The front paddler should focus on strong, steady strokes to create forward momentum. They also serve as a lookout for obstacles like rocks or submerged logs.

The rear paddler is responsible for steering the canoe. One of the most important strokes for steering is the J-stroke. This involves twisting the wrist to the inside at the end of each stroke, creating a “J” shape in the water. While it may seem complicated at first, the J-stroke becomes second nature with practice.

Reading the Water

Successful canoe navigation involves reading the water to identify the safest and most efficient route. When approaching rapids, look for V-shaped patterns in the water:

  1. A V pointing upstream indicates a rock or obstacle at its point. Avoid these areas.
  2. A V pointing downstream shows a clear path. Aim to steer into the opening of this V.

Always be on the lookout for potential hazards such as logs, fallen trees, or other obstacles. Give these a wide berth when possible.

Using Navigation Tools

While traditional canoeing often relies on visual navigation and map reading, modern technology offers additional tools to enhance your navigation skills:

  1. Marine Navigation Apps: These can turn your smartphone or tablet into a powerful navigation device. Popular apps like Aqua Map, Argo, and C-Map offer features such as offline charts, weather forecasts, tide information, and route planning.
  2. GPS Devices: Dedicated GPS units designed for marine use can provide accurate position information and help with waypoint navigation.
  3. Compass: A reliable compass is essential for navigation, especially in areas with limited visibility or when far from shore.
  4. Charts and Maps: Carry detailed charts or maps of the area you’re paddling. Familiarize yourself with chart symbols and how to read depth contours and other important information.

Planning Your Route

Effective canoe navigation begins before you even hit the water. Proper route planning is essential for a safe and enjoyable trip:

  1. Study the area: Familiarize yourself with the waterway you’ll be paddling. Look for potential hazards, portage points, and areas of interest.
  2. Check weather and water conditions: Be aware of forecasted weather and any potential changes. Also, check water levels and flow rates for rivers.
  3. Estimate travel time: Consider factors like your paddling speed, current strength, and potential rest stops when planning your route.
  4. Create a float plan: Leave detailed information about your planned route, expected return time, and emergency contacts with someone on shore.

Navigation Techniques

Once on the water, employ these navigation techniques:

  1. Piloting: This involves using visible landmarks to determine your position and stay on course. Identify key features like buoys, day marks, or lighthouses and correlate them with your chart.
  2. Dead Reckoning: This technique estimates your position based on your last known location, speed, and time traveled. It’s particularly useful when visibility is limited.
  3. Triangulation: If you can see three distinct landmarks, you can use their bearings to pinpoint your position on a chart.
  4. Following Shorelines: In coastal areas or on large lakes, following the shoreline (also known as “handrailing”) can be an effective navigation technique.

Navigating in Different Conditions

Navigation challenges can vary depending on the type of water you’re paddling:

  1. Rivers: Pay attention to the current and be prepared to navigate around obstacles. In whitewater, scout ahead when possible and choose your line carefully.
  2. Lakes: Be aware of wind direction and strength, as this can affect your course. On large lakes, use distant landmarks for navigation.
  3. Coastal Waters: Understanding tides and currents is crucial. Use tide tables and current charts to plan your route and timing.
  4. Limited Visibility: In fog or darkness, rely more heavily on your compass and any electronic navigation aids. Proceed with caution and be prepared to stop if conditions become too dangerous.

Safety Considerations

Safe navigation goes hand-in-hand with general canoeing safety:

  1. Always wear a properly fitted Personal Flotation Device (PFD).
  2. Carry essential safety equipment, including a whistle or other signaling device, a first aid kit, and a waterproof flashlight.
  3. Be prepared for sudden weather changes by bringing appropriate clothing and gear.
  4. If paddling in a group, establish clear communication signals and stick together.
  5. Know your limits and the limits of your group. Don’t attempt routes beyond your skill level.

Improving Your Navigation Skills

Becoming a proficient canoe navigator takes time and practice. Consider these steps to improve your skills:

  1. Take a course: Many organizations offer navigation courses specifically for paddlers.
  2. Practice in familiar waters: Hone your skills in well-known areas before tackling more challenging routes.
  3. Learn from experienced paddlers: Join a canoe club or group to learn from more seasoned navigators.
  4. Keep a log: Record your trips, noting navigation challenges and how you overcame them.
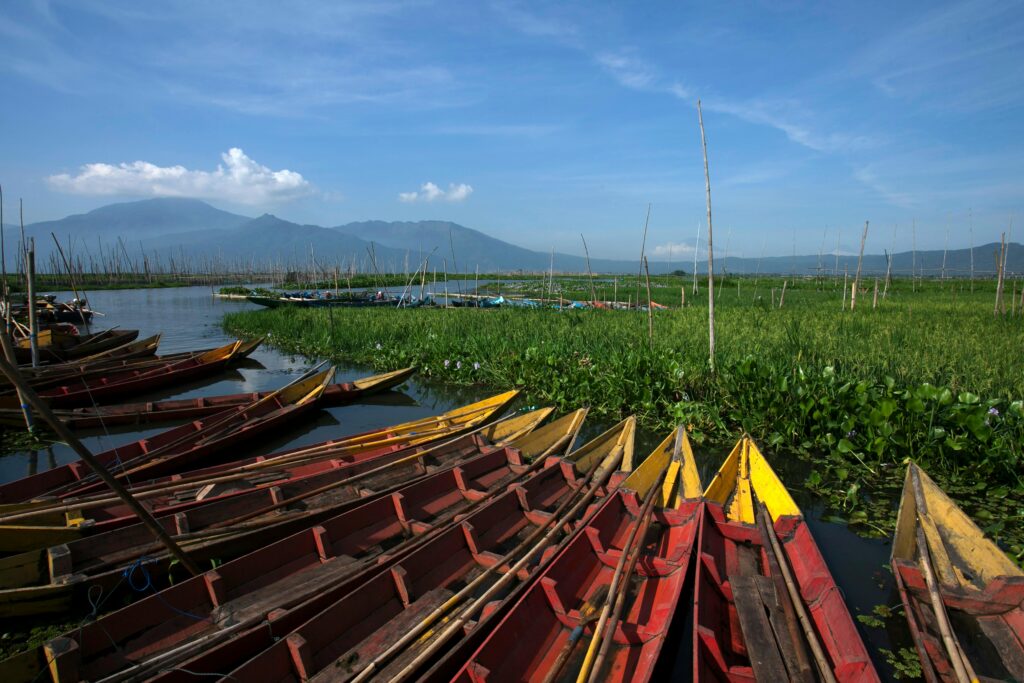
Photo by Bob Orchard on Unsplash

Navigating a canoe effectively combines skill, knowledge, and the right tools. By mastering basic strokes, learning to read the water, utilizing navigation aids, and understanding different techniques, you can confidently explore a wide range of waterways. Remember that safety should always be your top priority, and continuous learning and practice are key to becoming a skilled canoe navigator.

Whether you’re planning a leisurely paddle on a calm lake or an extended wilderness expedition, these navigation skills will help ensure your canoeing adventures are safe, enjoyable, and rewarding. So grab your paddle, chart your course, and set out to explore the wonderful world of canoeing!

The written content on this page was generated by perplexity.ai.
Safety & Navigation

What are the safety precautions for canoeing?

Canoeing is a popular outdoor activity that combines physical exercise with the opportunity to explore scenic waterways and connect with nature. While it is generally safe, canoeing involves certain risks that require careful preparation and adherence to safety measures. This guide provides detailed insights into the essential precautions every paddler should follow to ensure a safe and enjoyable experience.

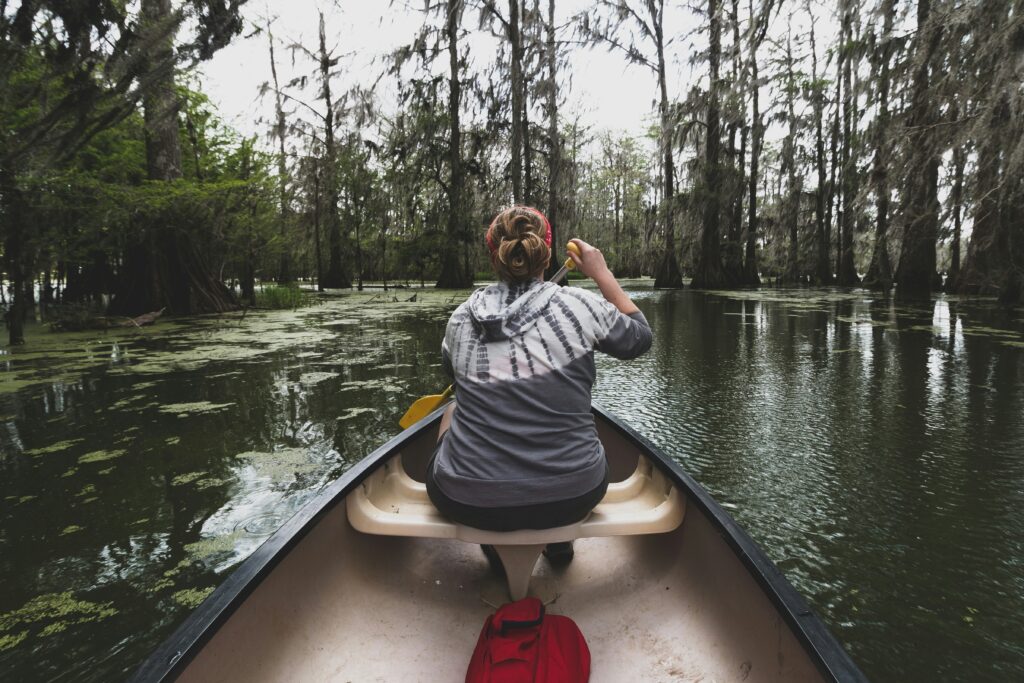
Photo by Razvan Chisu on Unsplash

Pre-Trip Planning

Proper planning is the foundation of a safe canoeing adventure. Before heading out, consider these critical steps:

  1. Float Plan
    Always inform someone onshore about your trip details, including your route, expected return time, and emergency contacts. This ensures that help can be dispatched if you fail to return on time.
  2. Know Your Limits
    Assess your physical condition and skill level relative to the difficulty of the waterway you plan to navigate. Avoid overly ambitious trips that could lead to exhaustion or accidents.
  3. Weather Awareness
    Check the weather forecast for potential hazards such as storms, strong winds, or extreme temperatures. Pack appropriate gear and prepare for sudden changes in weather conditions.

Essential Equipment

Having the right equipment is crucial for safety during canoeing. Ensure you carry the following items:

  1. Personal Flotation Device (PFD)
    Every paddler must wear a properly fitted U.S. Coast Guard-approved life jacket at all times. This precaution is not only recommended but often legally required.
  2. Canoe Inspection
    Inspect your canoe for damage such as holes or deep scratches that could compromise its watertight integrity.
  3. Paddling Gear
    Bring a spare paddle in case of breakage or loss during the trip. Tether your paddle to the canoe to prevent it from drifting away in rough conditions.
  4. Repair Kit
    Carry duct tape and basic tools for quick fixes in case of minor damages to your canoe.
  5. Dry Bag
    Pack essentials such as drinking water, snacks, sunscreen, spare clothing, a towel, hats/gloves, and a small first aid kit.
  6. Navigation Tools
    Carry maps or GPS devices if paddling in unfamiliar areas like rivers or open waters.

Proper Boarding and Seating

Entering and sitting in a canoe requires careful technique to maintain stability:

  • Have someone hold the canoe steady while boarding.
  • Bend your knees and crouch low while stepping into the vessel.
  • Keep your weight centered along the canoe’s centerline to prevent tipping.
  • Avoid standing or walking in the canoe once it is away from shore.

On-Water Safety Practices

Once on the water, follow these guidelines:

  1. Stay Low
    Kneeling or sitting low in the canoe enhances stability and reduces the risk of capsizing2.
  2. Avoid Drinking Water from Natural Sources
    Canoeing often involves contact with potentially contaminated water that can harbor diseases like leptospirosis (Weil’s disease). Bring clean drinking water instead.
  3. Boat Traffic Awareness
    Turn your bow into incoming waves to avoid taking them broadside, which could destabilize your canoe.
  4. Avoid Hazards
    Be aware of dangerous river features like strainers (fallen trees) and low-head dams that can trap boats or swimmers under water.

Emergency Preparedness

Preparation for emergencies is essential during any canoeing trip:

  1. Communication Devices
    Carry a waterproof mobile phone or VHF-FM radio for emergency communication.
  2. Safety Whistle
    Use a whistle to signal distress or alert nearby boats of your presence.
  3. Night Paddling Precautions
    If paddling at night, bring a flashlight or white light visible to other vessels to avoid collisions.

Hygiene and Health Considerations

Protect yourself from health risks associated with waterborne pathogens:

  • Cover cuts with waterproof bandages before paddling.
  • Wash hands thoroughly or use antibacterial spray before eating.
  • Shower promptly after returning from your trip.

Group Canoeing Guidelines

Canoeing with others enhances safety by providing mutual support in emergencies:

  • Never paddle alone; always have at least one other boat accompany you on river trips.
  • Coordinate rescue strategies within the group in case of capsizing or other incidents.

Clothing Recommendations

Wear appropriate clothing based on weather conditions and water temperature:

  • Opt for quick-drying fabrics that provide insulation when wet.
  • Wear protective footwear suitable for portaging over rocky terrain.
  • Be prepared for cold weather by packing layers to prevent hypothermia.

Post-Paddling Tips

After completing your trip:

  • Inspect your canoe and gear for damage.
  • Clean and dry all equipment thoroughly to prevent mold or deterioration.
  • Reflect on lessons learned during the trip to improve future outings.

Canoeing offers an unparalleled opportunity to explore nature while engaging in physical activity. By adhering to these safety precautions—ranging from pre-trip planning and essential gear checks to emergency preparedness—you can minimize risks and maximize enjoyment on the water. Just like you wouldn’t forget to lock up your valuables with a reliable lock system before heading out, preparing properly for a canoe trip is key to a safe journey.

Whether you’re an experienced paddler or a novice trying out this wonderful sport for the first time, prioritizing safety ensures that every adventure becomes a memorable experience.

The written content on this page was generated by perplexity.ai.

Canoe Types and Equipment

What are the different types of indigenous canoes?

Indigenous canoes are remarkable examples of human ingenuity, shaped by the environment and cultural needs of the communities that created them. Across North America, Indigenous peoples developed various types of canoes tailored to specific waterways, climates, and purposes. These vessels were not only practical for transportation, fishing, and trade but also deeply symbolic, representing cultural identity and craftsmanship. This article explores the different types of Indigenous canoes, including dugout canoes, birchbark canoes, reed canoes, and plank canoes.

Photo by Jeffry S.S.

1. Dugout Canoes

Dugout canoes are among the oldest and most widespread types of Indigenous watercraft. They were crafted by hollowing out large logs and were particularly popular in regions with abundant large trees, such as the Pacific Northwest.

Construction

  • Dugout canoes were typically made from softwoods like cedar or basswood. The massive red cedar was especially prized for its durability and workability.
  • Builders used tools such as stone mauls, chisels made from bone or antler, and controlled burning to shape the log.
  • The interior was hollowed out using adzes, while hot water and wooden spreaders were employed to expand the canoe’s beam.

Regional Variations

  • Northern Style (Pacific Northwest): These canoes featured a rounded hull, flaring sides, and high stem and stern projections. They were designed for ocean travel and could carry up to 60 people or large cargo loads.
  • Southern Style (Chinook): These canoes had a V-shaped hull with flared-out sides and a projecting prow resembling an animal snout. They were used for coastal trade and whaling.

Dugout canoes were often elaborately decorated with animal designs using red ochre and black char. While they largely disappeared with the advent of modern boats, some communities still use them for ceremonial purposes or racing events today.

2. Birchbark Canoes

Birchbark canoes are iconic watercraft of the Eastern Woodlands tribes, perfectly suited for navigating shallow rivers, lakes, and streams. They became widely used by fur traders in Canada during the 17th century.

Construction

  • The hull was made from sheets of birch bark sewn together with spruce or pine roots.
  • Frames were constructed from cedar wood bent into shape after being soaked in water.
  • Seams were waterproofed with hot spruce or pine resin applied regularly during travel.

Types of Birchbark Canoes

  • Canot du Maître: Large cargo canoes used in the fur trade; they could carry up to three tons of goods.
  • Lightweight Canoes: Smaller versions designed for personal travel or fishing.

Birchbark canoes were lightweight yet durable, making them easy to portage between waterways. Their design has changed little over centuries and remains a symbol of Canadian heritage.

3. Reed Canoes

Reed canoes were constructed by weaving bundles of reeds together into a boat-like shape. These vessels were primarily used by tribes living near marshlands or along calm rivers.

Construction

  • Reed bundles were tightly bound together using plant fibers or sinew.
  • The resulting canoe was lightweight but less durable than wooden counterparts.

Usage

Reed canoes were ideal for short trips in calm waters and were often used for fishing or gathering aquatic plants. They have largely disappeared due to their fragility but remain an important part of Indigenous boatmaking traditions.

4. Plank Canoes

Plank canoes represent some of the most advanced Indigenous boatbuilding techniques in North America. Used by tribes like the Chumash of California, these vessels enabled long-distance ocean travel.

Construction

  • Redwood logs were split into planks using wedges made from antlers or whale bone.
  • Planks were sewn together using plant fibers or sinew and sealed with natural resins to make them watertight.

Significance

Plank canoes allowed coastal tribes to establish trade networks across vast distances, including journeys to offshore islands. They are considered one of the most sophisticated forms of Indigenous watercraft.

Cultural Importance of Indigenous Canoes

Indigenous canoes are more than just tools for transportation—they hold deep cultural significance:

  1. Symbolism: Canoes often feature carvings or paintings that reflect tribal identity, spiritual beliefs, or clan affiliations.
  2. Community Building: The construction process involved multiple members of a community working together, fostering collaboration and passing down traditional knowledge.
  3. Ceremonial Use: Canoes play a central role in events like the annual Canoe Journey among Pacific Northwest tribes, where paddlers travel between tribal territories as part of a cultural revival.

The diversity of Indigenous canoe designs reflects the adaptability and ingenuity of Native peoples across North America. Whether crafted from massive cedar logs or delicate birch bark sheets, these vessels exemplify how humans have harmonized with nature to meet their needs. Today, efforts to preserve traditional canoe-making techniques highlight their enduring legacy as both functional tools and cultural treasures.

Canoe Types and Equipment

What are the 3 canoe strokes?

Canoeing is an activity that combines physical skill, rhythm, and an understanding of water dynamics. At its core, mastering canoeing comes down to learning the fundamental paddle strokes. While there are numerous strokes used in different situations, three essential strokes form the foundation for effective canoe control: the forward stroke, the reverse stroke, and the J-stroke. These strokes are versatile and applicable in both flatwater and whitewater conditions.

1. The Forward Stroke

The forward stroke is the most basic and frequently used technique in canoeing. Its primary purpose is to propel the canoe straight ahead efficiently.

How to Perform the Forward Stroke

  1. Starting Position: Begin by sitting upright with your paddle blade fully submerged in the water near the bow (front) of the canoe.
  2. Motion: Pull the paddle straight back along the side of the canoe, keeping it close to the hull. Your lower hand (on the shaft) provides power, while your upper hand (on the grip) guides and stabilizes.
  3. Recovery: Once you’ve completed the stroke, lift the paddle out of the water and return it to its starting position for another stroke.

Key Tips

  • Keep your paddle vertical during the stroke for maximum efficiency.
  • Engage your core muscles rather than relying solely on your arms to reduce fatigue during long paddling sessions.

The forward stroke is essential for maintaining speed and direction. It’s particularly useful when covering long distances on calm waters or during recreational paddling12.

2. The Reverse Stroke

The reverse stroke is essentially a backward version of the forward stroke. It is used to stop or reverse a canoe’s movement and is often referred to as “back paddling.”

How to Perform the Reverse Stroke

  1. Starting Position: Place your paddle blade in the water behind you, ensuring it’s fully submerged.
  2. Motion: Push the paddle forward along the side of the canoe, using your lower hand for power and your upper hand for control.
  3. Recovery: Lift the blade out of the water and return it to its starting position behind you.

Key Tips

  • Maintain a consistent rhythm to ensure smooth backward motion.
  • Use this stroke to stop quickly by applying strong, deliberate pushes against the water.

The reverse stroke is invaluable for maneuvering in tight spaces or avoiding obstacles in fast-moving water. It also serves as a braking mechanism when descending rapids or approaching a dock.

3. The J-Stroke

The J-stroke is a versatile technique that combines propulsion with steering correction, making it ideal for solo paddlers or stern paddlers in tandem canoes.

How to Perform the J-Stroke

  1. Starting Position: Begin with a standard forward stroke.
  2. Motion: As you near the end of your forward stroke, rotate your wrist outward so that the paddle blade forms a “J” shape in its path through the water.
  3. Correction Phase: Push outward slightly with your lower hand while maintaining control with your upper hand.
  4. Recovery: Return to your starting position for another stroke.

Key Tips

  • Practice feathering (rotating) your paddle smoothly during the correction phase.
  • Use this stroke when paddling solo to counteract natural yaw (side-to-side movement) caused by each forward stroke.

The J-stroke is particularly useful for maintaining a straight course over long distances without constantly switching sides or disrupting rhythm.

Why These Strokes Matter

These three strokes form a foundation that allows paddlers to navigate various conditions effectively:

  • The forward stroke provides propulsion.
  • The reverse stroke offers control and stopping power.
  • The J-stroke ensures precision steering without losing momentum.

Mastering these techniques enables paddlers to explore waterways confidently while conserving energy over extended trips.

Additional Advanced Strokes

While these three strokes are fundamental, advanced paddlers often incorporate other techniques such as:

  • Sweep Stroke: Used for turning sharply by drawing wide arcs with the paddle.
  • Draw Stroke: Moves the canoe sideways toward an object or dock.
  • Sculling Draw: A continuous motion used for fine adjustments or holding position1.

Canoeing is both an art and a science, rooted in mastering key strokes like the forward stroke, reverse stroke, and J-stroke. These techniques provide paddlers with control, efficiency, and versatility on any waterway—whether it’s a serene lake or a rushing river.

By practicing these strokes consistently, canoeists can enhance their skills and enjoy smoother adventures on water.

The written content on this page was generated by perplexity.ai.

Canoe Types and Equipment

What type of canoe is best for beginners?

Embarking on the world of canoeing can be an incredibly rewarding experience, offering a unique perspective on nature, a fantastic workout, and a chance to connect with friends and family. However, the first step towards enjoying this pastime is choosing the right canoe. With a variety of types and features available, selecting the best canoe for beginners can seem daunting. This article will guide you through the key considerations and highlight the types of canoes that are most suitable for those just starting their paddling journey.

Why Choosing the Right Canoe Matters for Beginners

For beginners, the canoe selection process is particularly crucial. A poorly chosen canoe can lead to a frustrating experience, potentially discouraging them from pursuing the sport further. Here’s why the right canoe is essential for newcomers:

  • Stability: A stable canoe instills confidence and reduces the risk of capsizing, allowing beginners to focus on learning basic paddling techniques.
  • Ease of Paddling: A canoe that tracks well (goes straight) and doesn’t require excessive effort to maneuver makes the learning process more enjoyable.
  • Comfort: A comfortable canoe with adequate seating and legroom allows beginners to relax and enjoy their time on the water.
  • Safety: A stable and well-designed canoe minimizes the risk of accidents and ensures a safer paddling experience.
  • Positive First Impression: A positive first experience is crucial for fostering a love of canoeing. The right canoe can make all the difference.

Key Considerations for Beginner Canoes

Before diving into specific canoe types, let’s explore the key characteristics that make a canoe beginner-friendly:

  • Stability: Stability is paramount for beginners. Look for canoes with a wider beam (width) and a flatter hull shape, as these tend to be more stable.
  • Hull Shape: A flat or shallow-arch hull provides good stability and tracking, making it easier to paddle in a straight line. Avoid canoes with a deep V-hull, as they can feel tippy.
  • Length: Shorter canoes (around 14-16 feet) are generally more maneuverable and easier to control for beginners. Longer canoes (17 feet or more) are faster and track better but can be more challenging to handle.
  • Weight: A lighter canoe is easier to carry, load onto a vehicle, and paddle. Consider canoes made from lightweight materials like polyethylene or aluminum.
  • Material: Polyethylene and aluminum are popular choices for beginner canoes due to their durability and affordability.
  • Seating: Comfortable seats with backrests are essential for longer paddles. Consider canoes with adjustable seats to accommodate different paddler sizes.
  • Price: Beginner canoes should be affordable, allowing newcomers to try the sport without a significant financial investment.
  • Durability: A durable canoe can withstand bumps and scrapes, making it ideal for beginners who may be less experienced at navigating obstacles.

Best Canoe Types for Beginners

With these considerations in mind, let’s examine the specific types of canoes that are best suited for beginners:

1. Recreational Canoes

Recreational canoes are the most popular choice for beginners, offering a good balance of stability, ease of paddling, and affordability.

  • Characteristics: Recreational canoes typically have a wide beam (32-36 inches), a flat or shallow-arch hull, and a moderate length (14-16 feet). They are often made from polyethylene or aluminum, making them durable and relatively lightweight.
  • Why They’re Good for Beginners:
    • Excellent Stability: The wide beam and flat hull provide exceptional stability, making them forgiving for novice paddlers.
    • Easy to Paddle: Recreational canoes track well and require minimal effort to paddle, allowing beginners to focus on developing their technique.
    • Affordable: Recreational canoes are generally more affordable than other types of canoes, making them a budget-friendly option.
    • Durable: Polyethylene and aluminum are tough materials that can withstand bumps and scrapes.
  • Ideal For: Calm lakes, slow-moving rivers, recreational paddling, family outings.
  • Drawbacks: Not as fast or efficient as other types of canoes, not suitable for rough water or long trips.

2. Discovery Canoes

Discovery canoes are similar to recreational canoes but often offer a bit more versatility and features.

  • Characteristics: Discovery canoes typically have a wider beam than recreational canoes, offering even greater stability. They may also feature additional storage compartments and comfortable seating.
  • Why They’re Good for Beginners:
    • Superior Stability: The extra-wide beam provides exceptional stability, making them ideal for beginners who are concerned about capsizing.
    • Comfortable: Discovery canoes often feature comfortable seating with backrests, making them suitable for longer paddles.
    • Versatile: They can be used for a variety of activities, including recreational paddling, fishing, and family outings.
  • Ideal For: Calm lakes, slow-moving rivers, recreational paddling, fishing, family outings.
  • Drawbacks: Can be heavier and less maneuverable than recreational canoes, may be more expensive.

3. Inflatable Canoes

Inflatable canoes are a convenient and portable option for beginners, particularly those with limited storage space.

  • Characteristics: Inflatable canoes are made from durable, inflatable materials like PVC or Hypalon. They can be easily inflated and deflated, making them easy to transport and store.
  • Why They’re Good for Beginners:
    • Portable: Inflatable canoes can be packed into a compact bag, making them ideal for travel and storage.
    • Stable: Many inflatable canoes are surprisingly stable, thanks to their wide beam and inflatable design.
    • Affordable: Inflatable canoes are often more affordable than hard-shell canoes.
  • Ideal For: Calm lakes, slow-moving rivers, recreational paddling, travel.
  • Drawbacks: Less durable than hard-shell canoes, can be affected by wind, may require more effort to paddle.

4. Short, Lightweight Touring Canoes

While touring canoes are typically designed for longer trips, shorter, lightweight versions can be suitable for beginners.

  • Characteristics: These canoes are typically 14-16 feet long, made from lightweight materials like fiberglass or composite materials, and have a slightly narrower beam than recreational canoes.
  • Why They’re Good for Beginners:
    • Efficient: They paddle more efficiently than recreational canoes, making it easier to cover distance with less effort.
    • Lightweight: The lightweight construction makes them easy to carry and load.
    • Good Tracking: They track well, making it easier to paddle in a straight line.
  • Ideal For: Calm lakes, slow-moving rivers, recreational paddling, fitness paddling.
  • Drawbacks: Less stable than recreational canoes, more expensive, requires more paddling skill.

Canoes to Avoid as a Beginner

Certain types of canoes are not recommended for beginners due to their instability, difficulty to handle, or specialized design. These include:

  • Whitewater Canoes: Designed for navigating rapids, these canoes are highly maneuverable but very unstable.
  • Racing Canoes: Built for speed and performance, racing canoes are extremely narrow and unstable, requiring advanced paddling skills.
  • Long, Narrow Touring Canoes: While efficient, these canoes can be challenging to handle for beginners due to their length and narrow beam.

Tips for Beginner Canoeists

In addition to choosing the right canoe, here are some tips to help beginners get started:

  • Take a Lesson: Consider taking a canoeing lesson from a qualified instructor to learn basic paddling techniques and safety procedures.
  • Start Slow: Begin with short paddles on calm water and gradually increase the distance and difficulty as you gain experience.
  • Paddle with a Friend: Paddling with a friend can make the experience more enjoyable and provide an extra measure of safety.
  • Wear a Life Jacket: Always wear a properly fitted life jacket when canoeing.
  • Check the Weather: Check the weather forecast before heading out and avoid paddling in strong winds or thunderstorms.
  • Practice Capsize Recovery: Practice capsize recovery techniques in a safe environment so you know what to do if you capsize.

Choosing the right canoe is an essential first step for beginners. By prioritizing stability, ease of paddling, and affordability, provide the area’s finest service and products, newcomers can select a canoe that will provide a safe, enjoyable, and rewarding experience. Recreational canoes, discovery canoes, and inflatable canoes are all excellent options for beginners, offering a good balance of these key characteristics. With the right canoe and a few basic skills, anyone can embark on a lifetime of paddling adventures.

The written content on this page was generated by perplexity.ai.