Beginner Guides

How to canoe a two-person beginner?

Canoeing offers a unique blend of tranquility and adventure, a chance to glide silently across pristine waters, explore hidden coves, and connect with nature on an intimate level. While solo paddling has its charms, sharing the experience with a partner can amplify the joy, fostering teamwork, communication, and lasting memories. However, for two beginners embarking on their first canoe journey, the initial strokes can feel like a comedic struggle against an uncooperative vessel. The key to transforming this potential chaos into a harmonious dance lies in understanding the fundamentals, practicing effective communication, and embracing the learning process with patience and a sense of humor.
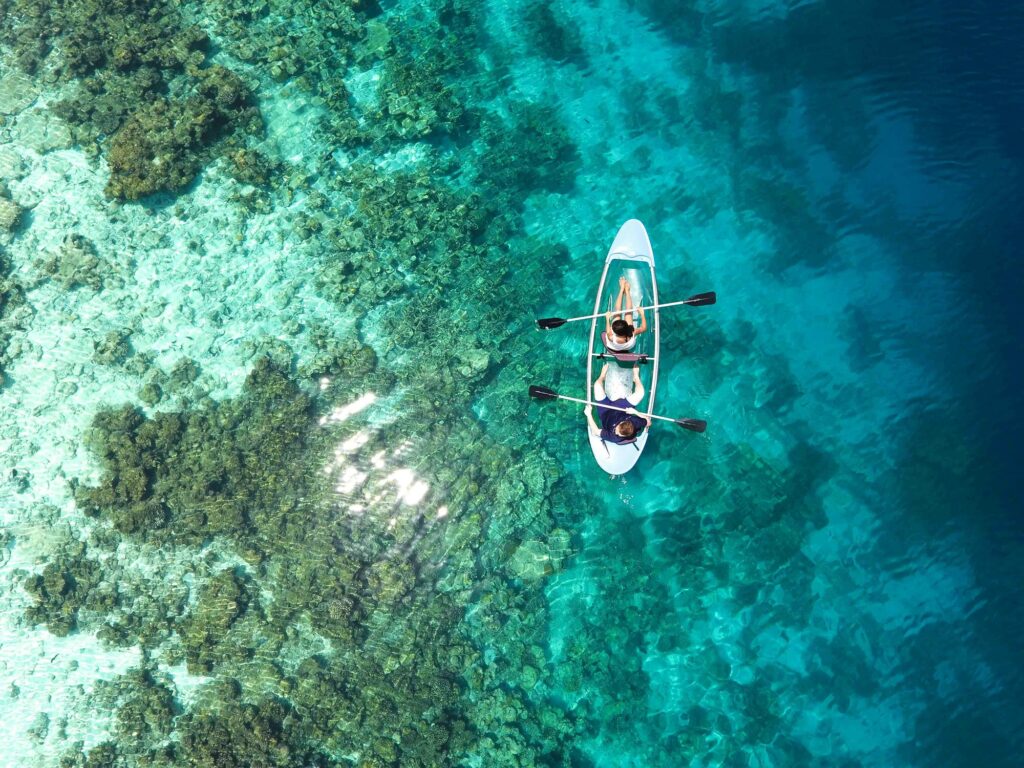
Photo by Asad Photo Maldives

This comprehensive guide will equip two-person beginner canoeists with the knowledge and skills necessary to confidently navigate the waters, from choosing the right equipment to mastering essential strokes and troubleshooting common challenges. By the end of this article, you’ll be well on your way to enjoying countless hours of paddling pleasure with your chosen partner.

I. The Foundation: Understanding Your Equipment

Before you even dip a paddle, it’s crucial to understand the tools of your trade. The right equipment can make all the difference in your comfort, safety, and overall enjoyment.

A. The Canoe: Canoes come in various shapes and sizes, each designed for specific purposes. For two beginners, an all-around recreational canoe is usually the best choice. Look for:

  • Stability: Wider, flatter-bottomed canoes offer greater initial stability, making them less prone to tipping, which is ideal for novices.
  • Length: A canoe between 15 and 17 feet long is generally suitable for two paddlers and some gear. Shorter canoes can be more maneuverable but might feel cramped, while longer ones offer better tracking (staying in a straight line) but are harder to turn.
  • Material:
    • Aluminum: Durable, low maintenance, and relatively inexpensive, but can be noisy and get hot in the sun or cold in cool weather.
    • Royalex/Polyethylene: Durable, quieter than aluminum, and more forgiving if you hit an obstacle. A good all-around choice.
    • Fiberglass/Composite: Lighter and often faster, but more fragile and expensive. Generally not recommended for absolute beginners due to their susceptibility to damage.
    • Inflatable: Portable and surprisingly stable, but can be slower and less efficient to paddle. Good for easy transport and storage.

B. Paddles: Just like canoes, paddles come in various forms. For beginners, a simple, straight-shaft paddle with a relatively wide blade is a good starting point.

  • Length: When standing, the paddle should reach roughly to your chin or eyes. The bow (front) paddler will typically use a slightly shorter paddle than the stern (back) paddler, as their paddling motion is more upright.
  • Material: Wood, aluminum, and plastic are common. Wood offers a nice feel but requires more maintenance. Aluminum and plastic are durable and low-maintenance.

C. Personal Flotation Devices (PFDs): This is non-negotiable. Every person in the canoe, regardless of swimming ability, must wear a properly fitted PFD (life vest).

  • Fit: Ensure it’s snug but comfortable, allowing for full range of motion for paddling. It shouldn’t ride up when you lift your arms.
  • Type: Look for a Type III PFD, which is designed for general recreational use and offers good mobility.

D. Essential Gear (Beyond the Basics):

  • Bailer or Sponge: Inevitable water accumulation from splashes or rain necessitates a way to remove it.
  • Whistle: For signaling in an emergency.
  • Throw Bag with Rope: A crucial safety item for rescuing someone who has capsized or gone overboard.
  • First-Aid Kit: For minor scrapes and injuries.
  • Water Bottles/Hydration: Stay hydrated, especially on sunny days.
  • Sun Protection: Hat, sunglasses, and sunscreen.
  • Appropriate Clothing: Dress in layers, avoiding cotton, which stays wet and cold. Quick-drying synthetics are ideal.
  • Dry Bag: To protect valuables (phone, camera, wallet) from water.
  • Map/Compass or GPS: Even on familiar waters, it’s easy to get disoriented.

II. Pre-Launch Preparations: Setting the Stage for Success

A smooth launch sets the tone for a successful trip.

A. Loading the Canoe: Distribute weight evenly from side to side and front to back. Heavier items should be placed low in the canoe to maintain stability. If you have a cooler, position it in the center.

B. Entering the Canoe: This is often where the first wobbles occur.

  • Teamwork: One person steadies the canoe while the other enters.
  • Low Center of Gravity: Keep your body weight low. Step into the center of the canoe, not the gunwales (sides).
  • Even Distribution: Each person should enter and position themselves carefully, distributing their weight along the centerline.
  • Kneeling (Optional but Recommended for Stability): For added stability, especially in choppy water or for beginners, you can kneel with your bottom resting against the thwart (crossbar) and your knees spread wide on the bottom of the canoe. This significantly lowers your center of gravity.

C. Seating Positions and Roles:

  • Bow Paddler (Front): This person sets the pace, identifies obstacles, and provides power for forward motion. Their primary role is propulsion.
  • Stern Paddler (Back): This person is the “captain” or steersperson. They control the direction of the canoe and provide directional power. This role requires more finesse and control. For two beginners, it’s often beneficial for the stronger or more coordinated paddler to take the stern position initially. You can always switch roles later!

III. The Art of Paddling: Mastering the Strokes

Effective paddling in a two-person canoe is all about synchronized effort and understanding the purpose of each stroke.

A. Basic Forward Stroke (Power Stroke): This is the most fundamental stroke for moving the canoe forward.

  • Bow Paddler:
    1. Reach: Extend the paddle forward as far as comfortable, with the blade fully submerged just in front of your feet.
    2. Catch: “Catch” the water firmly with the blade.
    3. Pull: Pull the paddle straight back along the gunwale, using your core muscles, not just your arms. Keep the blade close to the canoe.
    4. Exit: Remove the blade from the water when it reaches your hip.
    5. Recovery: Bring the paddle forward smoothly for the next stroke.
  • Stern Paddler: The stern paddler performs a similar forward stroke, but with an added “J-stroke” component (explained below) to maintain direction.

B. The J-Stroke (Stern Paddler’s Steering Stroke): This is the most crucial stroke for the stern paddler to keep the canoe tracking straight. Without it, the canoe will constantly turn away from the side the stern paddler is paddling on.

  1. Forward Stroke Initiation: Begin a regular forward stroke.
  2. Outward Turn: As the blade reaches your hip, rotate your wrist slightly, turning the power face of the blade outward from the canoe.
  3. “J” Shape: Push the blade away from the canoe in a “J” shape, using the water as a pivot point to subtly steer the stern back in line.
  4. Recovery: Feather the blade (turn it parallel to the water) and bring it forward for the next stroke.

The goal is to make the “J” stroke as subtle as possible, minimizing power loss while effectively steering. With practice, it becomes a fluid, almost imperceptible motion.

C. Reverse Stroke (Back Paddling): Used for stopping, slowing down, or moving backward.

  • Action: Simply perform the forward stroke in reverse: place the blade at your hip and push forward toward your feet.

D. Draw Stroke (Moving Sideways Towards the Paddle): Used for moving the canoe sideways, usually to pull the canoe into a dock or away from an obstacle.

  • Action: Reach out to the side of the canoe, fully submerge the blade, and pull the water directly towards the canoe.

E. Pry Stroke (Moving Sideways Away From the Paddle): Used for moving the canoe sideways, pushing it away from the paddle.

  • Action: Place the blade close to the canoe, deep in the water, and use the gunwale as a fulcrum to pry the canoe away from the paddle.

IV. Communication: The Unspoken Paddle Stroke

Perhaps even more important than mastering individual strokes is developing effective communication between paddlers. Miscommunication is the primary cause of frustration and inefficiency in a two-person canoe.

A. Verbal Cues:

  • “Go Forward!” / “Stop!”: Simple commands for overall speed.
  • “Left!” / “Right!”: Commands for turning. The stern paddler usually initiates turns, but the bow paddler can assist with a sweep stroke.
  • “Slow Down!” / “Speed Up!”: For adjusting the pace.
  • “Switch Sides!”: If one paddler gets tired or to balance the workload, though ideally, you shouldn’t need to switch too often with proper technique.
  • “Obstacle Ahead!” / “Rocks!” / “Shallow!”: The bow paddler’s crucial role in identifying hazards.
  • “How’s the Pace?”: A simple check-in to ensure both paddlers are comfortable.

B. Non-Verbal Cues: With practice, you’ll develop a sense of your partner’s rhythm and intent. A shared understanding of the water, the canoe’s momentum, and subtle body language can reduce the need for constant verbal commands.

C. The Rhythm: The bow paddler sets the rhythm, and the stern paddler matches it. Aim for a consistent, synchronized stroke. Avoid “over-paddling” or “under-paddling” your partner.

V. Steering and Maneuvering: Navigating the Waters

A. Straight-Line Paddling:

  • Stern Paddler’s J-Stroke: As discussed, this is paramount.
  • Synchronized Forward Strokes: Both paddlers should be paddling with power and rhythm.
  • Occasional Switches (Optional): If the canoe still pulls to one side, the bow paddler can occasionally switch sides for a few strokes to help correct. However, with a good J-stroke, this shouldn’t be necessary often.

B. Turning:

  • Basic Turn (Stern-initiated):
    • To turn right, the stern paddler does a strong forward stroke on the left side of the canoe, while the bow paddler maintains a regular forward stroke.
    • To turn left, the stern paddler does a strong forward stroke on the right side.
  • Sweep Strokes (Bow-assisted Turn): The bow paddler can assist turns by performing a “sweep” stroke.
    • To turn right, the bow paddler extends their paddle far out to the left side and sweeps it in a wide arc towards the stern.
    • To turn left, the bow paddler sweeps on the right side.
  • Draw/Pry for Sharp Turns: For very sharp turns or to pivot the canoe in place, both paddlers can use coordinated draw and pry strokes.

C. Stopping:

  • Both paddlers perform reverse strokes simultaneously.

VI. Troubleshooting Common Beginner Challenges

A. Spinning in Circles:

  • Culprit: Often, the stern paddler is not effectively using the J-stroke, or one paddler is paddling significantly harder on one side.
  • Solution: Stern paddler focuses on mastering the J-stroke. Both paddlers ensure their strokes are balanced in power.

B. Hitting Obstacles:

  • Culprit: Lack of awareness, poor communication, or slow reaction time.
  • Solution: Bow paddler is the “eyes” and calls out obstacles early. Stern paddler is ready to steer or stop.

C. Getting Tired Quickly:

  • Culprit: Using arm muscles instead of core muscles. Incorrect paddle length or technique. Inconsistent pace.
  • Solution: Focus on using your torso and core for power. Ensure correct paddle length. Maintain a steady, sustainable pace. Take short breaks as needed.

D. Arguing with Your Partner:

  • Culprit: Frustration, miscommunication, differing expectations.
  • Solution: Patience, clear and calm communication, a sense of humor. Remember it’s a team effort, and everyone is learning. Celebrate small victories.

E. Capsizing:

  • Culprit: Loss of balance, sudden movements, hitting submerged objects, rough water.
  • Solution: Stay calm. Hold onto the canoe. Attempt to right the canoe and re-enter using established techniques (look up “canoe self-rescue”). If unable, swim the canoe to shore. Always wear your PFD!

VII. Safety First: Always Prioritize Your Well-being

  • Tell Someone Your Plans: Inform a friend or family member of your route and estimated return time.
  • Check Weather Forecasts: Avoid strong winds, thunderstorms, or extreme temperatures.
  • Know Your Limits: Don’t attempt trips beyond your skill level or physical endurance.
  • Stay Sober: Alcohol and drugs impair judgment and reaction time.
  • Respect the Water: Be aware of currents, rapids, and other hazards.
  • Leave No Trace: Pack out everything you pack in.

The Journey of Shared Discovery

Canoeing as a two-person beginner is an incredibly rewarding experience. It’s a journey of shared discovery, not just of the natural world, but also of your own teamwork, communication, and resilience. Expect some wobbles, a few missed strokes, and perhaps even a good laugh at your initial attempts. Embrace these moments as part of the learning process. With patience, practice, and a commitment to working together, you and your partner will soon be gliding effortlessly across the water, enjoying the serene beauty and the unique camaraderie that only a shared paddle can bring. The rhythm of your paddles, the whisper of the water, and the shared joy of exploration will become a cherished part of your adventures together.

The written content on this page was generated by perplexity.ai.
Seasonal Advice

How do you canoe against the wind?

Canoeing against the wind is a demanding yet fulfilling endeavor that tests a paddler’s skill, endurance, and strategic thinking. The wind’s force creates resistance, pushing the canoe off course and making forward progress more difficult. Additionally, wind-driven waves add instability and the risk of swamping or capsizing. To successfully navigate these challenges, paddlers must combine refined techniques, tactical planning, and safety awareness. Building on foundational advice, this expanded guide delves deeper into methods and considerations for paddling effectively and safely against the wind.

Understanding the Dynamics of Wind and Canoe Interaction

Wind acts on a canoe much like a sail on a boat, exerting lateral pressure that can cause the canoe to “pinwheel” (spin uncontrollably) or be pushed sideways off course. The canoe’s trim—its balance and weight distribution—is crucial in resisting these forces. Wind also generates waves whose size and spacing relative to the canoe’s length affect handling; waves shorter than the canoe length can cause the boat to slam between crests, increasing the chance of swamping. Awareness of these dynamics helps paddlers anticipate and counteract wind effects.

Enhanced Techniques for Canoeing Against the Wind

Maintain Proper Trim with Precision

A canoe acts like a weathervane in the wind. When paddling into a headwind, it is essential to weigh down the bow slightly (one to two inches) to help the canoe point into the wind and reduce sideways drift. However, too much weight forward risks taking on waves, so balance is key. Conversely, when paddling with a tailwind, weighting the stern helps maintain control. Adding weight can be done with gear such as coolers or water jugs, or even sandbags if necessary.

Quarter Waves with Skill and Caution

Quartering waves—approaching them at a 30- to 45-degree angle—is a technique favored by experienced paddlers. This angle allows the canoe to fit between wave crests, reducing splash and providing a smoother ride. However, this method requires excellent balance and quick reflexes because the canoe is prone to broaching (being pushed sideways by waves or gusts). Beginners are advised to paddle head-on into waves for greater stability and safety.

Running Broadside When Necessary

If waves are shorter than the canoe’s length, paddling head-on can cause a wet and unstable ride. In such cases, running broadside—positioning the canoe perpendicular to waves and riding in the troughs—can reduce pounding. This technique causes the canoe to bob up and down like a cork, which may be wet but can be safer than slamming into waves.

Use Tacking to Navigate Side Winds

When the wind comes from the side, paddling directly toward your destination is inefficient because the wind will push you off course. Tacking involves paddling at about a 45-degree angle into the wind and zigzagging toward your goal, similar to sailing. This method uses the wind to your advantage, maintaining control and reducing wasted effort.

Paddling on the Same Side in Unison

While traditional canoeing teaches alternating sides, paddling on the same side simultaneously can be effective against strong side winds. Paddling on the downwind side helps maintain course and stability when other techniques fail, especially if the wind is pushing the canoe sideways.

Keep Your Weight Low and Centered

Lowering your center of gravity by kneeling and keeping weight centered improves stability. Many paddlers sit on the front edge of their seat with knees on the floor, which lowers the profile and enhances balance in windy, wavy conditions. This position also helps the canoe respond better to paddle strokes and reduces the risk of capsizing.

Continuous Paddling to Maintain Momentum

The canoe is most vulnerable to wind and waves when the paddle is out of the water. Strong, consistent paddle strokes keep the canoe moving forward, helping it punch through waves and resist being blown off course. Mastery of basic strokes like the forward stroke, pry, and draw is essential for efficiency and control against the wind.

Use Your Paddle as a Rudder

Dragging the paddle briefly in the water can help steer the canoe’s bow into the wind, improving directional control. This rudder effect is especially useful when trying to maintain a steady course in gusty conditions.

Paddle from Your Knees for Stability

Kneeling lowers your center of gravity and improves balance, making it easier to handle rough water and wind. This technique is widely recommended for paddling in challenging conditions.

Tactical Planning for Windy Conditions

Stick Close to Shore for Shelter

Land features such as trees and cliffs can block or reduce wind intensity. Staying near shorelines provides protection from gusts and reduces the risk of being blown into hazards like downed trees or rocks. In case of capsizing, proximity to shore is safer and allows for easier rescue or recovery.

Take Advantage of Wind Eddies and Calm Spots

Wind eddies—calm areas of water behind land formations like bays and points—offer valuable rest stops. Planning a route that hops between these protected spots helps conserve energy and reduces exposure to rough conditions.

Plan Short and Fast Crossings

When crossing open water exposed to headwinds, choose the narrowest points and aim for quick crossings. Expect slower speeds—around one mile per hour in heavy headwinds—and avoid long crossings that can exhaust paddlers and increase danger.

Adjust Your Route or Timing

If wind conditions are severe, consider postponing your trip or selecting alternative routes with more shelter. Paddling earlier in the day when winds are lighter or waiting for calmer weather improves safety and enjoyment.

Additional Safety Considerations

  • Wear Appropriate Clothing: Wind and waves cause spray and splashes; waterproof gear keeps paddlers dry and comfortable.
  • Add Weight to Bow if Needed: If the bow is too light, adding weight helps maintain trim and reduces wind effects.
  • Practice Regularly: Skill-building in various wind conditions builds confidence and competence.
  • Know Your Limits: If conditions become too dangerous, seek shelter or end the trip early.
  • Use Communication Devices: Carry a whistle, radio, or cell phone in a waterproof case for emergencies.

Canoeing against the wind requires a blend of technical skill, tactical planning, and situational awareness. Maintaining proper trim, mastering advanced paddling techniques like quartering waves and tacking, keeping weight low and centered, and continuous paddling are fundamental to overcoming wind resistance. Tactical choices such as sticking close to shore, using wind eddies, and planning short crossings enhance safety and efficiency. Additional measures like using the paddle as a rudder, paddling from the knees, and adding weight to the bow further improve control. By integrating these detailed strategies, paddlers can confidently navigate windy waters, transforming potential obstacles into rewarding adventures.

The written content on this page was generated by perplexity.ai.

Safety & Navigation

What is the proper way to sit in a canoe?

Proper sitting technique in a canoe is crucial for balance, control, comfort, and efficient paddling. Whether you are a beginner or experienced paddler, understanding how to position your body correctly can significantly enhance your canoeing experience and safety. This article explores the proper way to sit in a canoe, including posture, positioning, and variations depending on the paddling context. Before heading out for any outdoor activity like canoeing, it’s also important to ensure your home is secure and functional services like mobile garage door repair and maintenance can help prevent unexpected issues while you’re away.

Photo by Rachel Claire

Importance of Proper Sitting in a Canoe

The way you sit affects your canoe’s stability and your paddling efficiency. A well-balanced posture lowers your center of gravity, improves your control over the canoe, and reduces fatigue. Conversely, poor sitting posture can lead to instability, inefficient strokes, and discomfort or injury over time.

Basic Sitting Posture

The ideal sitting posture in a canoe involves sitting upright with a relaxed but straight back. Avoid slouching or leaning too far backward, as this can reduce your paddling power and increase the risk of tipping. Your spine should be slightly forward of vertical to engage your core muscles effectively, which helps in generating stronger paddle strokes and maintaining balance.

Your knees should be bent comfortably, with feet positioned close to the centerline of the canoe, resting against the hull or air chambers for support. This positioning helps you maintain balance and control, especially when paddling in rough water or windy conditions.

Where to Sit in the Canoe

  • Tandem Canoes: In a two-person canoe, the more experienced paddler typically sits in the stern (rear) to steer and control the boat, while the bow paddler provides forward power. The heavier paddler is often placed in the rear for better balance, though experience can override this rule.
  • Solo Canoeing: When paddling solo, the common practice is to sit near the center or slightly off-center, often kneeling or sitting on the bow seat facing the stern. This central positioning improves control and balance.

Sitting Positions and Variations

Sitting on the Seat

Sitting directly on the canoe seat with knees lowered below the gunwale level is the most common and comfortable position for many paddlers. This position provides good power and balance, though it raises your center of gravity compared to kneeling.

Kneeling

Kneeling in a canoe lowers your center of gravity, making the boat more stable and easier to control, especially in rough or windy conditions. When kneeling, you can use the front edge of the seat to support much of your body weight, which relieves pressure on your knees and allows for better mobility to adjust your balance.

Many paddlers use knee pads inside the canoe to increase comfort during kneeling. Some combine kneeling and sitting by extending one leg forward while kneeling on the other, allowing for greater flexibility and comfort during long paddles.

Cross-Legged Sitting

Some paddlers adopt a cross-legged sitting position on the seat, which can be comfortable for short periods and provides a low center of gravity. However, this position may limit mobility and is less common for extended paddling sessions.

Spread Two-Point High Kneel

This kneeling position involves spreading the knees apart while kneeling, which increases stability and is useful when paddling into wind or waves. It is often used in smaller solo canoes and freestyle paddling.

Mixed Positions

Many canoeists switch between sitting and kneeling during a trip to maintain comfort and adapt to changing water conditions. Sitting is generally preferred for comfort and endurance, while kneeling is favored for stability and control in challenging conditions.

Foot Placement

Proper foot placement is essential for balance and control. Your feet should be positioned so that they provide a stable base without pushing against the canoe’s sides too hard, which can cause instability. Typically, feet rest flat or slightly angled against the hull or air chambers near the centerline.

Additional Tips for Proper Sitting in a Canoe

  • Keep Your Weight Centered: Avoid leaning too far to one side, as this can cause the canoe to heel and increase the risk of capsizing.
  • Use the Thwart for Support: The thwart (crossbar) can be used to brace yourself and help maintain balance, especially when kneeling or in rough water.
  • Adjust for Comfort: Experiment with different sitting and kneeling combinations to find what works best for your body and the paddling conditions.
  • Maintain Good Posture: Keep your back straight and engage your core muscles to reduce fatigue and improve stroke power.

The proper way to sit in a canoe depends on your paddling style, the canoe type, and water conditions. Key points include:

  • Sit upright with a relaxed but straight back, slightly leaning forward.
  • Position knees bent with feet near the canoe’s centerline for balance.
  • Sit on the seat with knees lowered for comfort and power.
  • Kneel to lower your center of gravity and increase stability, especially in rough conditions.
  • Use knee pads for comfort when kneeling.
  • Adjust your position as needed during paddling for comfort and control.
  • Place the more experienced paddler in the stern for tandem canoes.

By adopting proper sitting techniques, canoeists enhance their safety, control, and enjoyment on the water.

The written content on this page was generated by perplexity.ai.

Canoeing Guidelines

Do you need a license for a canoe in Minnesota?

In Minnesota, the regulations regarding canoe licensing are clear and designed to ensure safety on the water. Canoeing is a popular outdoor activity in the state, thanks to its many lakes and rivers. However, understanding whether a license is required for your canoe can be crucial for compliance with local laws. This article will explore the licensing requirements for canoes in Minnesota, including exceptions, registration processes, and safety considerations.

Licensing Requirements for Canoes in Minnesota

General Licensing Rules

In Minnesota, all non-motorized watercraft that are over 10 feet in length must be licensed by the Department of Natural Resources (DNR). This includes canoes, kayaks, paddleboards, and other similar vessels. If your canoe measures 10 feet or less, you do not need to register it or obtain a license.

Exceptions to Licensing

There are specific exceptions to the licensing requirement that boaters should be aware of:

  • Out-of-State Watercraft: If a canoe is registered in another state and is not kept in Minnesota for more than 90 consecutive days, it does not require a Minnesota license.
  • Government-Owned Watercraft: Canoes owned by government entities are exempt from licensing unless used for recreational purposes.
  • Certain Types of Craft: Lifeboats and specific hunting boats during designated seasons may also be exempt from licensing requirements.

Registration Process

If you own a canoe that requires registration, here’s how to go about it:

  1. Complete the Universal Registration Form: This form can be printed from the DNR website.
  2. Submit Your Application: You can apply in person at designated locations such as county customer service centers.
  3. Provide Necessary Documentation: Bring valid identification and any other required documents, such as a certificate of origin if the canoe is new.
  4. Pay Registration Fees: Fees vary based on the type of watercraft and its length. For canoes over 10 feet, you can expect to pay around $23 plus an issuing fee.

Importance of Licensing

Licensing your canoe is not just about compliance; it also contributes to safety on Minnesota’s waterways. Licensed watercraft are easier to identify in case of emergencies or accidents. Furthermore, registration helps fund conservation efforts and maintenance of public waterways.

Safety Regulations for Canoeing

In addition to licensing requirements, there are several safety regulations that canoeists should adhere to while enjoying Minnesota’s waters:

Life Jacket Requirements

Minnesota law mandates that all children under the age of 10 must wear a life jacket when aboard any watercraft, including canoes. While adults are not required by law to wear life jackets, it is highly recommended for safety.

Equipment Regulations

Canoes should be equipped with essential safety gear such as:

  • A whistle or sound-producing device
  • A white light if paddling at night
  • A first aid kit
  • Extra paddles and flotation devices

Boating Education

While no formal boating education is required for operating non-motorized vessels like canoes, understanding basic boating safety principles is beneficial. The DNR offers resources and courses that cover essential safety practices.

In summary, whether you need a license for your canoe in Minnesota largely depends on its length. Canoes over 10 feet must be registered with the DNR, while smaller ones do not require licensing. Understanding these regulations helps ensure a safe and enjoyable experience on Minnesota’s beautiful waters.For those planning to embark on canoeing adventures, it’s essential to stay informed about local laws and safety practices. By doing so, you contribute not only to your safety but also to the preservation of Minnesota’s natural resources.

The written content on this page was generated by perplexity.ai.